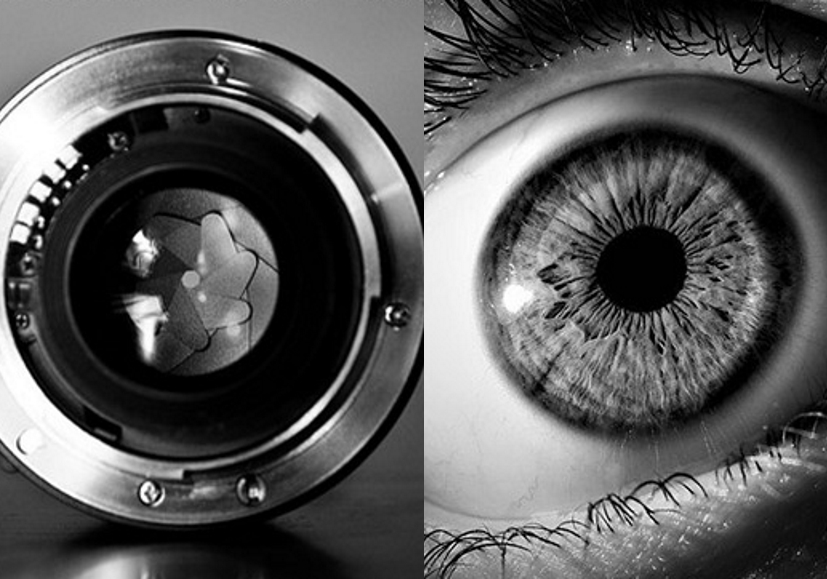
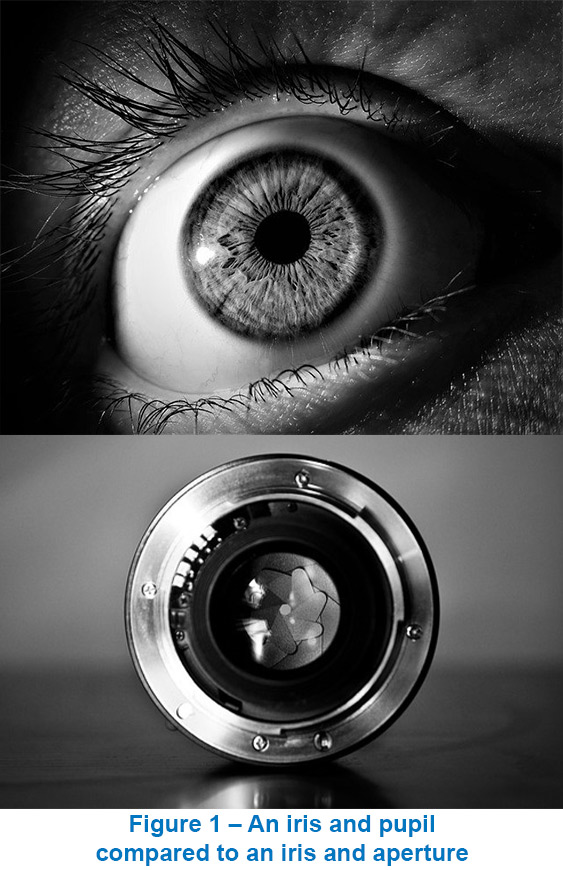
Aperture vs. Pupil
The human eye has an iris and a pupil which is the opening that allows light to pass through. A similar system operates within a camera lens, but instead, the iris is made of pieces of metal converging to form the aperture, an opening in the center. The iris of a lens is a means to the aperture, which ultimately is what affects the final image captured by a camera. A comparison between an iris and pupil and an iris and aperture can be seen in Figure 1.
The smaller the aperture, the more focused the light will be, allowing for a larger depth of field (DOF) – covered in more detail later. This is inversely proportional to the amount of light that reaches the sensor. So, when trying to achieve a bright and focused image, aperture plays an important role. However, sometimes its relationship with focus and brightness might not be desirable. This blog covers the different ways to adjust aperture, how to take advantage of its optical impact, and provides alternative options for getting bright and focused images in various conditions.
What is aperture?
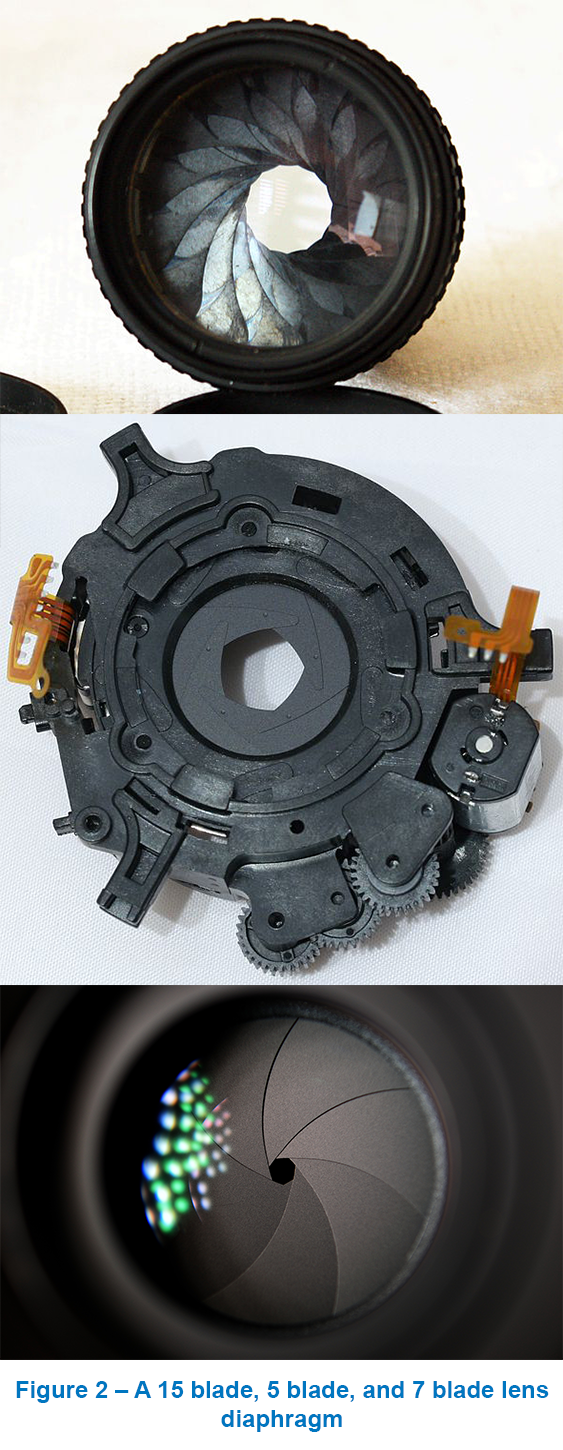
The aperture of a lens is the opening through which light passes to reach the camera. Adjusting the aperture means making that opening larger or smaller with a lens diaphragm usually made up of metal blades or leafs within the lens. The number of blades within the diaphragm can vary significantly, as shown by the comparison of various lens diaphragms in Figure 2.
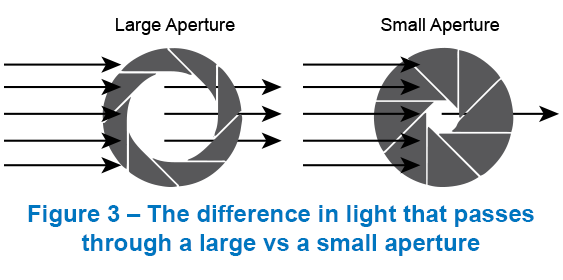
A lens with the diaphragm wide open is referred to as having a large aperture. When the iris / diaphragm is open just a little, it is referred to as a small aperture, as seen in Figure 3.
F-stops
The somewhat less intuitive aspect of aperture is that the more open the iris, the smaller the number used to represent its size. Aperture is represented in terms of f-stops that have values such as, f/2, f/2.8, f/4, f/5.6, f/8, f/11, f/16 (read as “f 16,” for example). It might seem confusing as to why f/2 is a larger aperture compared to f/16, but this is because each number is a fraction. This can be thought of as having ½ of a pizza instead of 1/16th of a pizza. In this context, it becomes clear that the lower numerical value of an f-stop represents a bigger portion of the lens diaphragm opening up for more light to enter.
Depth of Field vs Brightness
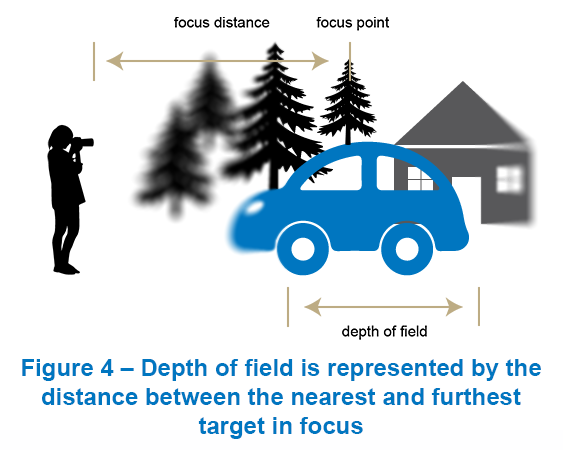
By opening up a camera’s lens iris, the aperture increases and allows more light to reach the sensor. This produces a well-illuminated image. However, if the aperture is too open this can cause a significant reduction in the DOF. This is often referred to as a narrow DOF. The DOF is the distance between the nearest and furthest target within the image that remain in focus, represented by the diagram in Figure 4.
The DOF and the amount of light passing through the lens are inversely proportional. So, it can be challenging to get enough of an image in focus, such as Figure 5, while also having enough light to illuminate the target clearly.

However, the reduction in light reaching the sensor does not mean that a camera cannot take advantage of a larger DOF. Using additional lighting (whether added equipment or ensuring adequate sunlight) can take advantage of smaller apertures, such as f/25 used to image Figure 6 on a sunny day. In this figure, branches from a maple tree are shown with an aperture of f/25 on the top image and f/5 on the bottom. The smaller aperture allows more of the image to remain in focus, providing useful information on the targets further away.

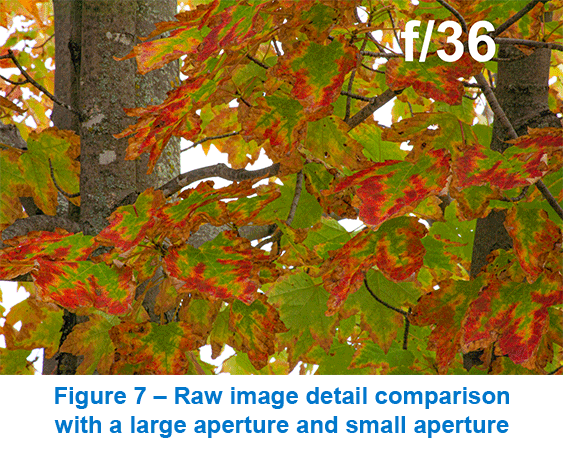
Additionally, by using a camera that can capture RAW images, such as the Teledyne Lumenera Lt1245R, images can be processed to reveal far more image data then would be shown by default. An example of this is shown in Figure 7 where a seemingly dark target can be revealed by manipulating the image data. The difference in DOF can be seen when the enhanced f/36 image is compared to the same target imaged with an aperture of f/5.6.
Gain
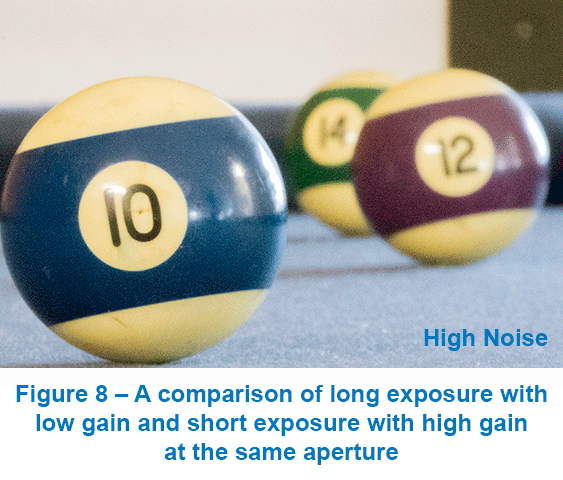
To adjust for having a greater DOF and having most of the image in focus, the camera may need to increase the gain value. By increasing the gain the increased sensitivity will not only result in a brighter image, but it will also include more noise, as shown in Figure 8. Relying on gain too heavily to brighten an image can result in poor quality instead of allowing more light to enter the lens with a wider aperture. Less noise can be achieved through longer exposure instead of using higher gain, but if the target is moving it can introduce image blur that can be even more challenging. The proper balance of gain, shutter speed, and aperture can help increase image brightness without introducing too much noise and keeping the targets in focus.
Shutter Speed
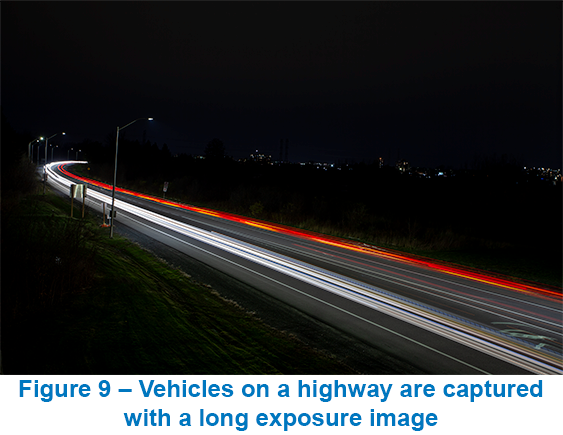
Instead of just relying on the gain of the camera or the aperture of the lens, the shutter speed can also be adjusted. The quicker the shutter can close over the sensor, the less light will come through and minimize the time the sensor is left exposed. Using a slow shutter speed is referred to as a long exposure shot. By allowing the camera to take in light for a longer period of time, the target can be well illuminated. However, this may also result in motion blur if the target is not still, see Figure 9, where vehicles are captured using a long shutter speed. So, a moving target such as a vehicle may require faster shutter speeds with the combination of wider aperture and higher gain to ensure sufficient lighting.
Applications
Using a large aperture can be an advantage when light is at a deficit. With high frame rate applications such as machine vision inspection or even lower altitude aerial imaging, the boost in brightness can ensure an image with clear image data.
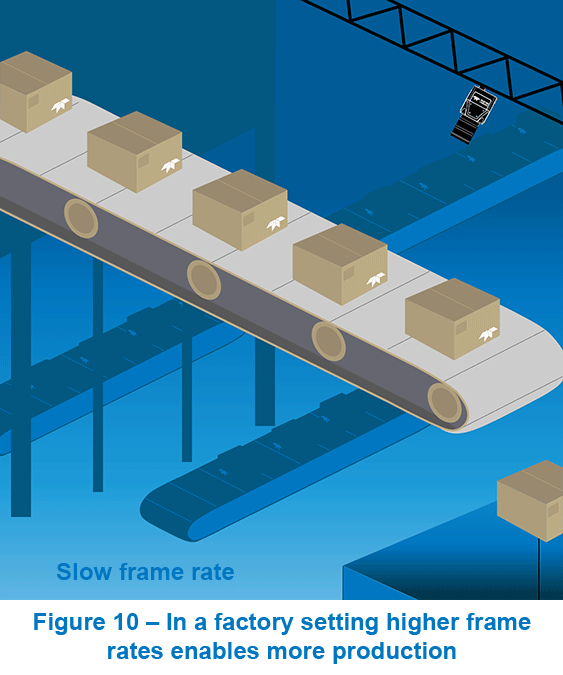
In the case of machine vision inspection, if the volume of items being imaged increases, so does the need for frame rate. The aperture will also need to increase proportionally to ensure that high frame rate recording can image with enough light. However, as previously mentioned, the increase in aperture results in a shallow DOF that has a minimal tolerance for the distance the target can be from the lens. This type of shallow DOF is utilized quite effectively with conveyor belt systems, see Figure 10, where products continue to pass by the camera at a fixed distance with high speed but remain in focus and well illuminated. Additionally, by using a wide open aperture the camera can have a clear separation between the target foreground and anything else that may be in the image background due to the shallow DOF.
A smaller aperture can also help with applications that require a longer DOF. By implementing longer exposure or by using a higher gain, a camera can still produce a bright image while keeping much more of the content in focus. This is useful in imaging applications such as Intelligent Traffic Systems (ITS) where a typical challenge is ensuring that a camera can still clearly image vehicles at different distances.
P-Iris
This discussion on taking advantage of the aperture of a lens comes with a big caveat. The camera aperture is normally configured before deployment and sometimes requires ongoing manual adjustment as either the system or the operating conditions change. The solution to this is a software solution that can quickly adjust to the exact aperture value of a camera without the need for ever getting physically close. Precision Iris, known as P-Iris, is a software solution to adjusting an aperture without the need for configuring the lens beforehand. P-Iris has the ability to reliably maintain and return to a specific aperture value while also being able to vary the aperture in challenging conditions where gain and shutter speed are at their predetermined limits.
Every model in the Teledyne Lumenera LtX45R camera series is equipped with a controller to accept P-Iris lenses. To find out more about P-Iris, details can be found in the blog post, “Why You Should Be Using A P-Iris Lens In Your Vision System.“
Conclusion
There is a constant challenge with most imaging systems to capture well-lit and in focus images. However, the reality of many imaging systems is that light may be at a deficit or vary significantly in uncontrolled environments such as with outdoor applications. By understanding the optical impact of aperture and its relationship with shutter speed and gain, deliberate adjustments can be made to optimize an imaging system to ensure the best possible image capture even in the most challenging conditions.For more information, please contact Teledyne Lumenera’s imaging experts. They can also help with selecting the cameras to best meet your requirements. Reach out at [email protected].
And, sign up for our newsletter to automatically receive regular updates from Teledyne Lumenera.
